
Building a Multi-Agent Healthcare Assistant ⚕️

Building a Multi-Agent Healthcare Assistant ⚕️
Imagine a hospital where every specialist—the receptionist, the triage nurse, the scheduler—is a dedicated digital assistant. That's the power of a multi-agent architecture. Instead of a single, monolithic AI trying to do everything, you build specialized agents that each handle a specific part of a complex workflow. This makes your system more reliable, easier to manage, and perfectly mirrors real-world processes.
Market Reality: The global agentic AI in healthcare market is exploding from $538 million in 2024 to a projected $4.96 billion by 2030—a 45% annual growth rate. You're not just building a demo; you're working on the future of healthcare AI.
Why Multi-Agent?
In a hospital, a patient's journey isn't a single event. It's a series of handoffs:
- Intake: "Hello, thank you for calling."
- Triage: "What are your symptoms?"
- Scheduling: "Let me find an available doctor."
- Confirmation: "Your appointment is booked."
A multi-agent system replicates this by creating an IntakeAgent, a RoutingAgent, and a BookingAgent. Each one is an expert in its domain and knows when to pass the conversation to the next agent in the chain.
Why This Matters : Nature's latest research declares multi-agent systems "the next paradigm in medical artificial intelligence." Meanwhile, 85% of healthcare leaders are already exploring or adopting generative AI capabilities.
How to Do Multi-Agent Handoffs (The Critical Part)
The key to a multi-agent system is the handoff—but here's what most tutorials get wrong: you must pass context.
class IntakeAgent(Agent):
    async def route_to_specialist(self, ctx: RunContext, intent: str, patient_info: dict):
        # CRITICAL: Store data in context before handoff
        ctx.userdata.patient_name = patient_info.get("name")
        ctx.userdata.symptoms = patient_info.get("symptoms")

        if "appointment" in intent:
            routing_agent = RoutingAgent()
            await routing_agent.initialize(ctx)  # Pass the context!
            return routing_agent, "Let me find the right doctor for you."
Production Reality Check: The difference between toy demos and production systems is how they handle context limits. When you hit token limits, agents can spawn fresh subagents with clean contexts while maintaining continuity through careful handoffs. Most developers completely ignore this until it's too late.
Calling Tools for External Systems
An agent isn't useful without the ability to interact with the real world. In LiveKit, you connect your agents to external systems—like a hospital database or a scheduling API—using tool calls. Think of tools as your agent's hands.
The @function_tool Decorator
LiveKit's @function_tool decorator turns any asynchronous Python function into a tool that your Large Language Model (LLM) can call. The LLM's job is to figure out when to call the tool and what arguments to provide.
from livekit.agents import function_tool, RunContext

@function_tool
async def find_doctors_for_symptoms(ctx: RunContext, symptoms: str, day: str):
    """Find available doctors based on patient symptoms and preferred day."""
    # Your database query logic goes here.
    doctors = await hospital_db.query_doctors(symptoms, day)

    # Store data for the next agent
    ctx.userdata.available_doctors = doctors
    return doctors

@function_tool
async def book_appointment_slot(ctx: RunContext, doctor_id: str, time_slot: str):
    """Book confirmed appointment in hospital system."""
    booking = await hospital_db.create_appointment(doctor_id, time_slot)
    return booking
Key takeaways from the code:
- Docstrings matter: The LLM uses the function's docstring to understand what the tool does and when to call it. Be descriptive!
- Context is key: Use ctx.userdata to pass data between agents. This is where most multi-agent systems break.
- MCP Standard: Most production systems now support Model-Context-Protocol (MCP) for robust context management.
Collecting Data with AgentTask
Sometimes you need to complete a complex, multi-step process without any interruptions or handoffs. This is where AgentTask comes in.
from livekit.agents import AgentTask

class PatientRegistrationTask(AgentTask):
    def __init__(self):
        self.required_fields = ["name", "phone", "insurance", "symptoms"]
        self.collected_data = {}

    async def on_enter(self, ctx: RunContext):
        """Start the registration process"""
        await self.collect_patient_info(ctx)

        if self.is_complete():
            patient_record = self.build_patient_record()
            self.complete(patient_record)

    async def collect_patient_info(self, ctx: RunContext):
        """Systematically collect all required information"""
        for field in self.required_fields:
            if field not in self.collected_data:
                response = await self.ask_for_field(field)
                self.collected_data[field] = response
                # Validate and store in context
                ctx.userdata[f"patient_{field}"] = response

    def is_complete(self):
        return all(field in self.collected_data for field in self.required_fields)
You can chain these tasks together to create a robust workflow:
# Sequential task execution
patient_info = await PatientRegistrationTask(ctx)
insurance = await InsuranceVerificationTask(ctx)
eligibility = await EligibilityCheckTask(ctx)
# Now you have complete, validated data
An AgentTask is perfect for processes like patient intake, where you need to collect a series of data points (name, address, insurance info) before moving on.
Get Away Knowledge: How to Start
- Map your workflow: Before writing any code, sketch out the steps of your process. Who handles each step? This will become your multi-agent architecture.
- Define your tools: Identify every interaction with an external system (e.g., database queries, API calls). Write a
@function_toolfor each one. - Build the agents: Create a class for each agent, giving it specific instructions and the relevant tools. Remember to configure the handoff logic to route the user to the correct agent at the right time.
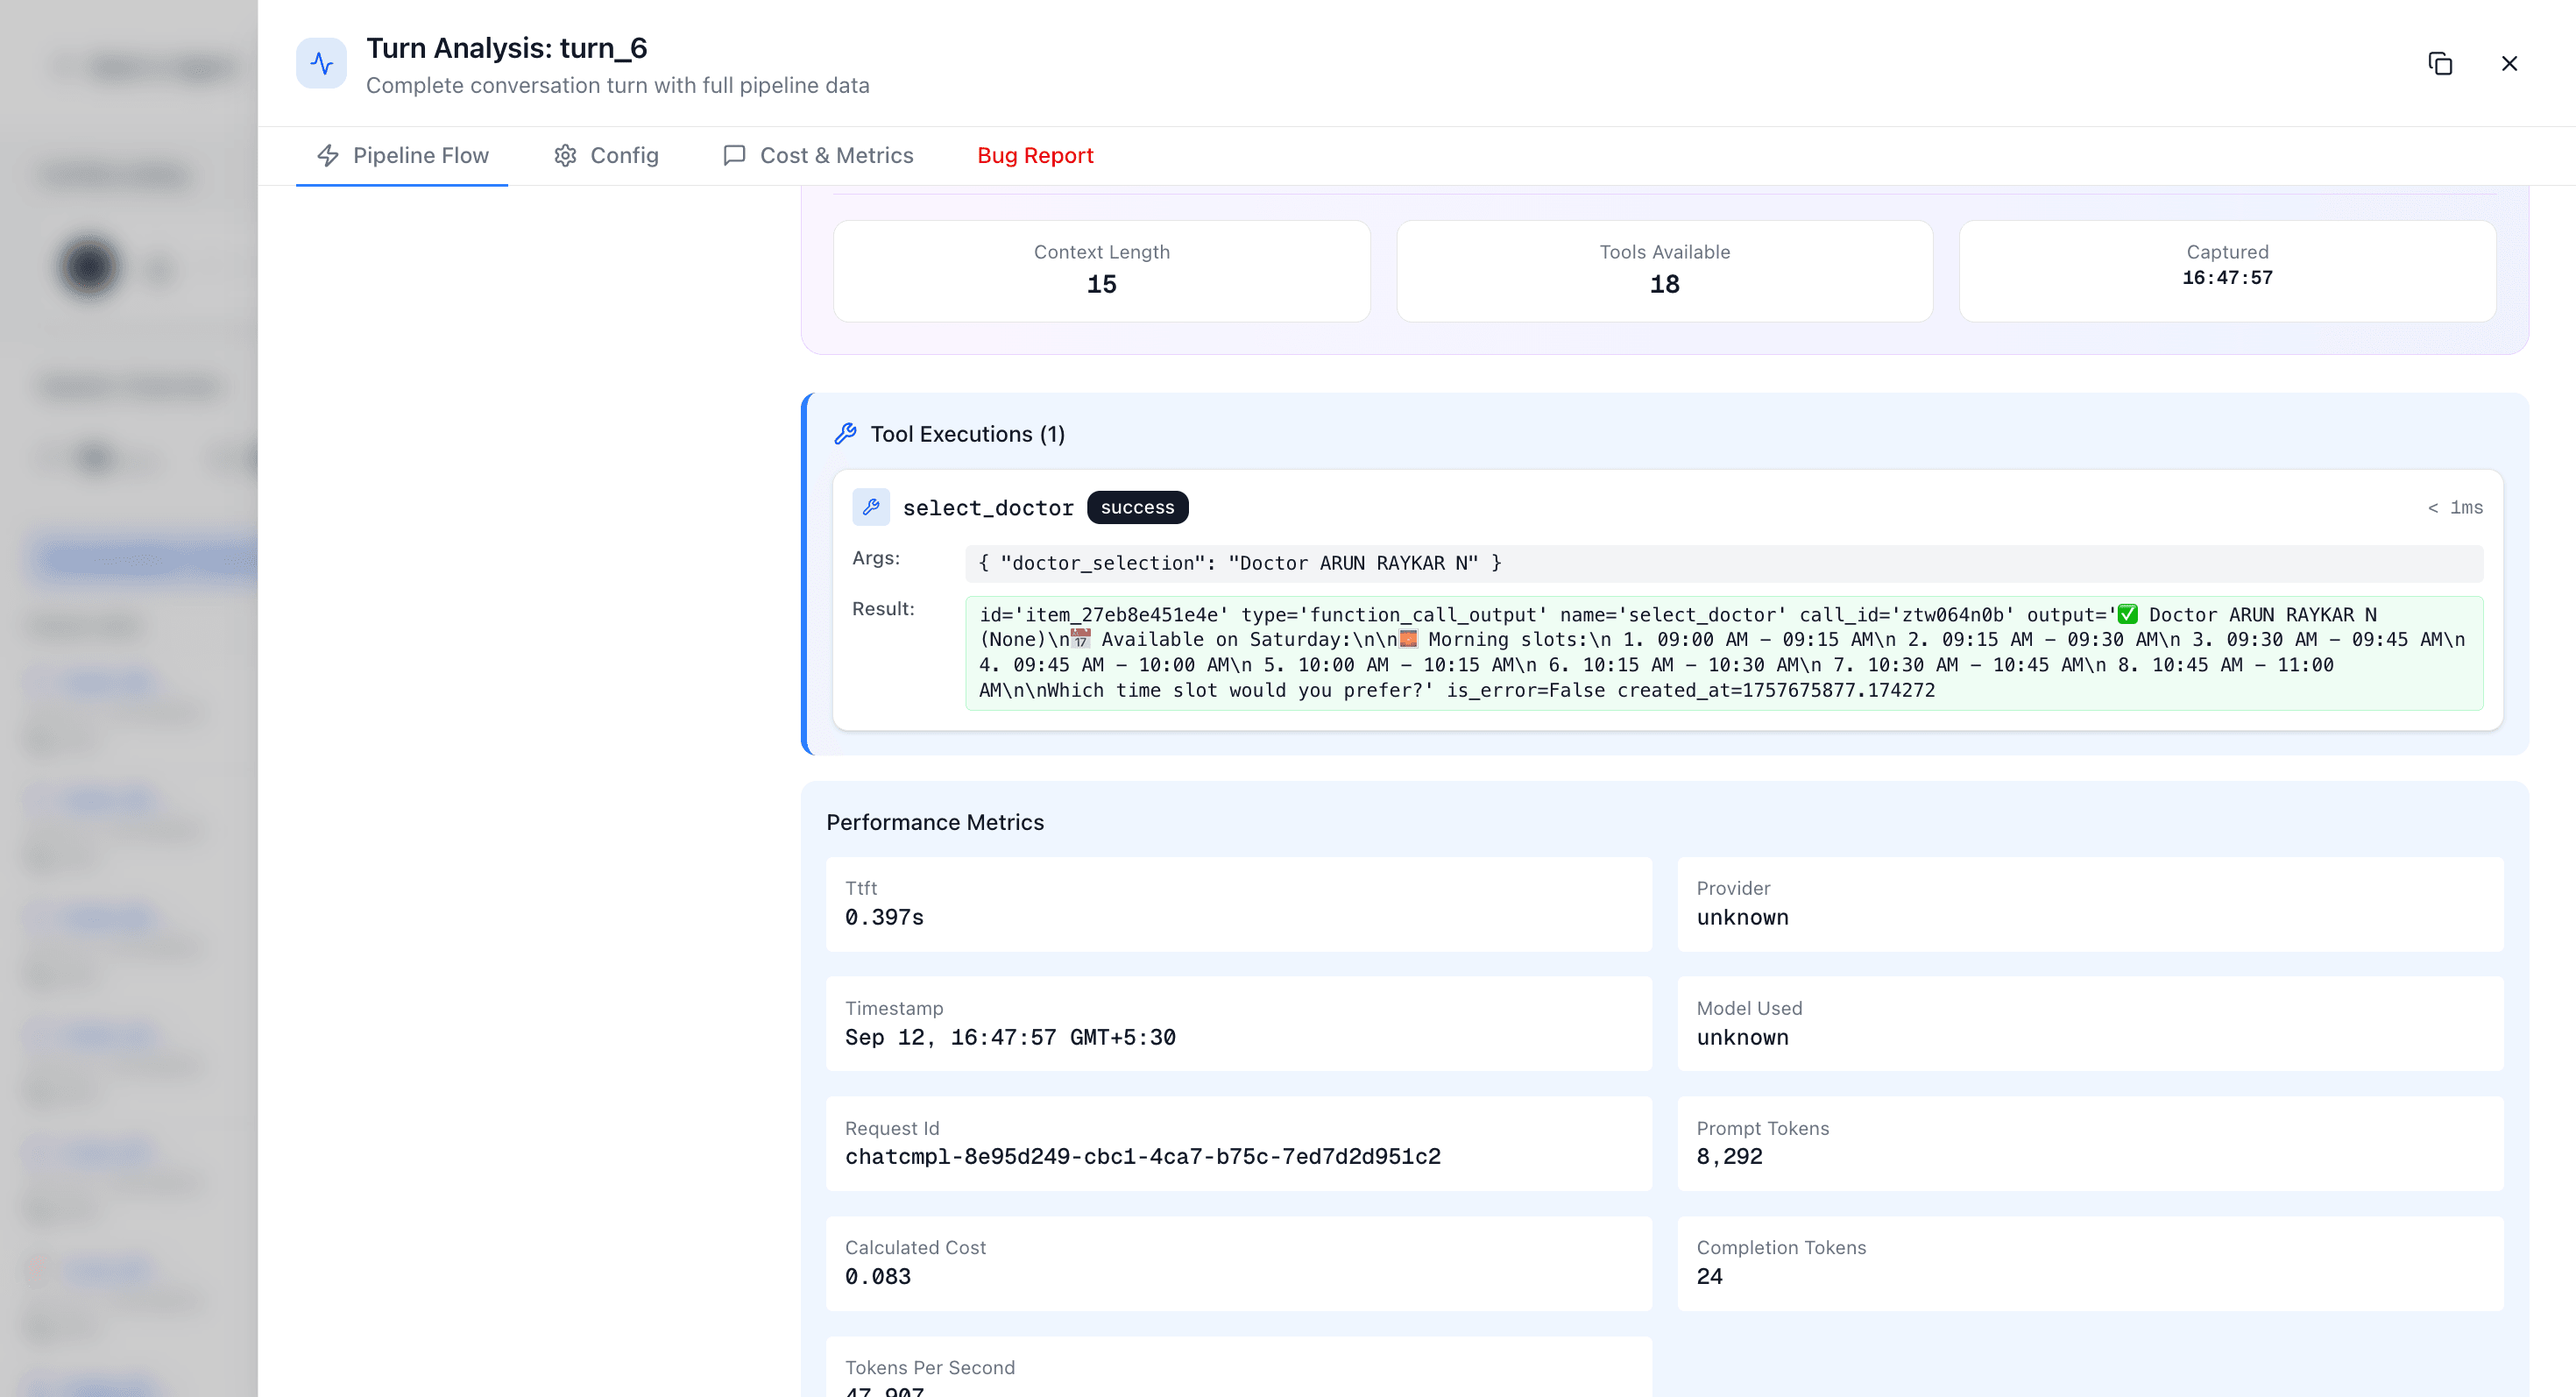
- Observe everything: Integrate tools like Whispey (https://whispey.xyz/) to monitor performance, latency, and success rates. This is critical for debugging and ensuring your system meets performance standards.
- Manage state: Use the
RunContextobject'suserdatato pass information collected by one agent to the next.
What's Next?
In the next blog, we'll dive into evaluating and maintaining tool accuracy across sessions—including techniques for logging, measuring success rates, and improving LLM decisions based on real-world usage.
You'll learn:
- How to measure agent performance in production
- Techniques for continuous model improvement
- Debugging multi-agent interactions
- Scaling considerations for enterprise deployment
Remember: A reliable system isn't just built—it's monitored, tested, and continuously improved. You're building the infrastructure that will power the next generation of healthcare AI.